
Wouldn’t it be great if kids came into the world with the innate desire to eat nourishing food?
Every day, dining rooms across America erupt into a battle of parents pleading, begging and arguing with their kids about broccoli, asparagus and an array of healthy, whole foods. What if there was a way to introduce our kids’ taste buds to these foods so that years later, as they grow, they’ll want vegetables on their own because that’s what they’re used to?

By following these tips and introducing healthy foods to your kids when they’re young, the dinnertime struggle won’t become your story. The goal is for you to feel empowered to feed your infant nourishing foods, while allowing baby to acquire a taste for them on their own accord. We never want to force new foods (or experiences) or build a negative association with something. Be patient, but consistent, and you’ll have your little one eating healthy, and loving it, in no time.
Here Are the BEST Ways to Introduce Your Baby's Taste Buds to Nourishing Foods
Now that Isla is ready to make the switch from breast milk to solid foods, I have the responsibility of introducing foods that will fuel her body for the rest of her life.
Initially, the thought of being responsible for her nutrition and helping to establish healthy habits that will ultimately shape her relationship with food was overwhelming. Where do I start? What’s the best, most effective way to teach her to make healthy choices?
Because the thought of figuring it out all on my own made my brain feel like it was about to explode, I started asking around and getting input from fellow moms, pediatricians and other health professionals. What I learned from them (and successfully incorporated) was the following.
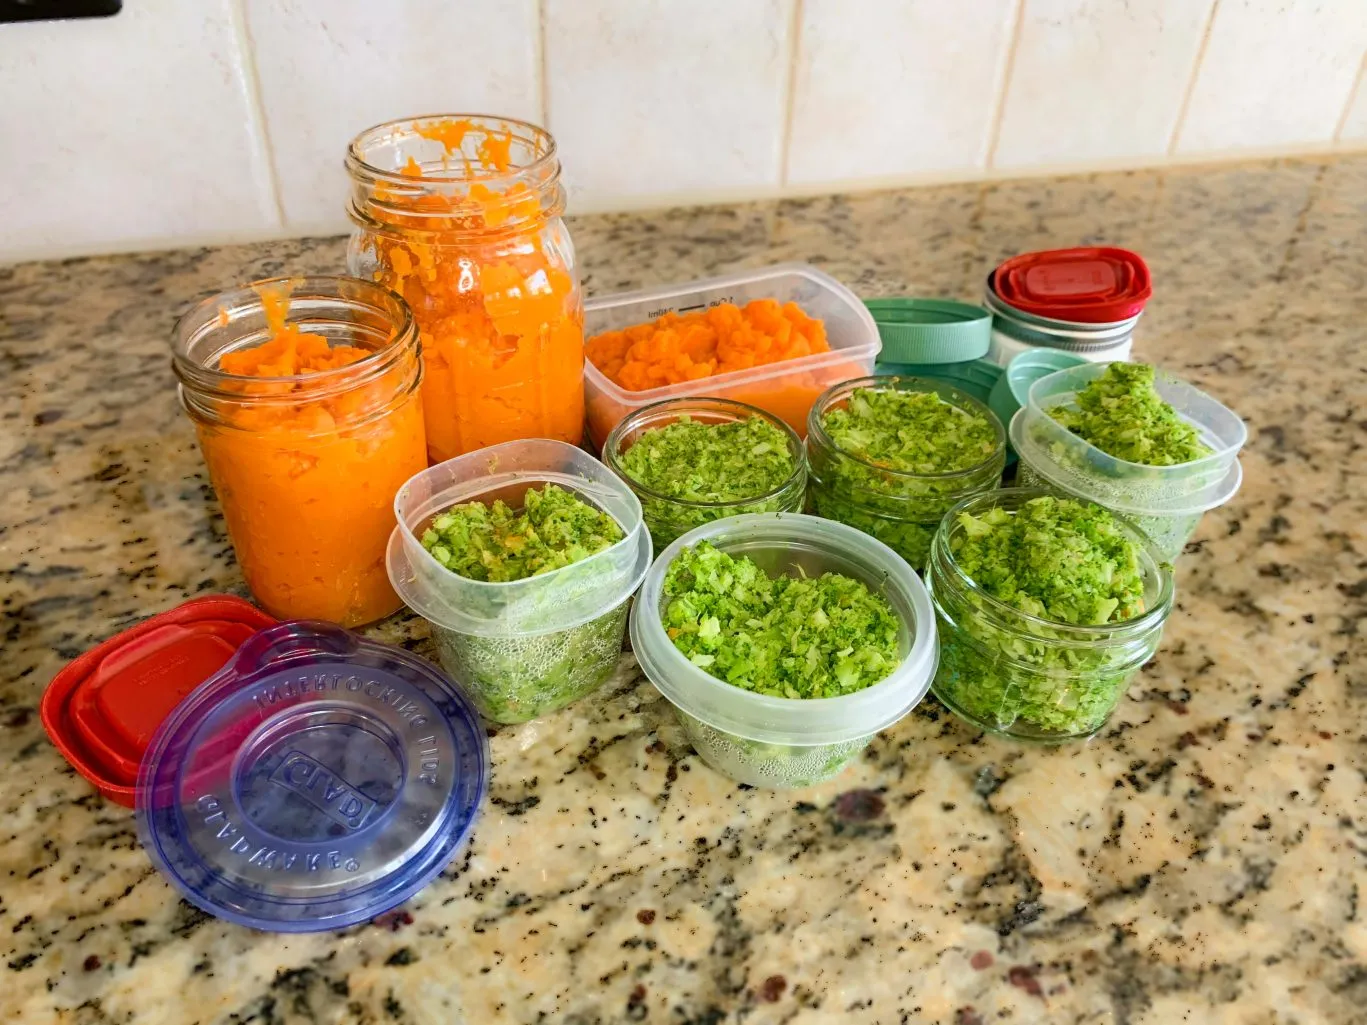
Puree Your Own Baby Food
Pureeing is MUCH more simple than it sounds. Basically, all you need is a steamer, microwave or pan to soften or cook the food, a food processor or high-speed blender to puree, a little water and small mason jars to pre-portion and store. The best part is that it can easily be done while multitasking around the house.
Why is pureeing your own foods better than store-bought baby food?
We understand how hectic motherhood is and how difficult it can be to find the time to prepare nourishing meals, let alone puree your own baby food. Here’s the thing… pureeing is SIMPLE. Like, super simple. There are countless reasons why you may want to consider it, and here are a few of the big ones.
One huge benefit is quality control. Baby food manufacturers have one priority when making baby food: profits. To cut costs they add fillers, thickening agents/starches and preservatives to the food. There have also been several reports of toxic heavy metals being found in commercial baby food. Pureeing is simple and allows you to know exactly what’s going into your baby’s tummy.
In addition to being more nutritious, it’s also cost-effective. After some calculating, I found that homemade organic purees were almost 50% cheaper than store-bought. By pureeing your own baby food, you can save upwards of $1.50 per day, or $547 per year.

Introduce Foods in a Specific Order
If you want to encourage lifelong healthy eating habits, it’s important to take a systematic approach when introducing solid foods to your baby.
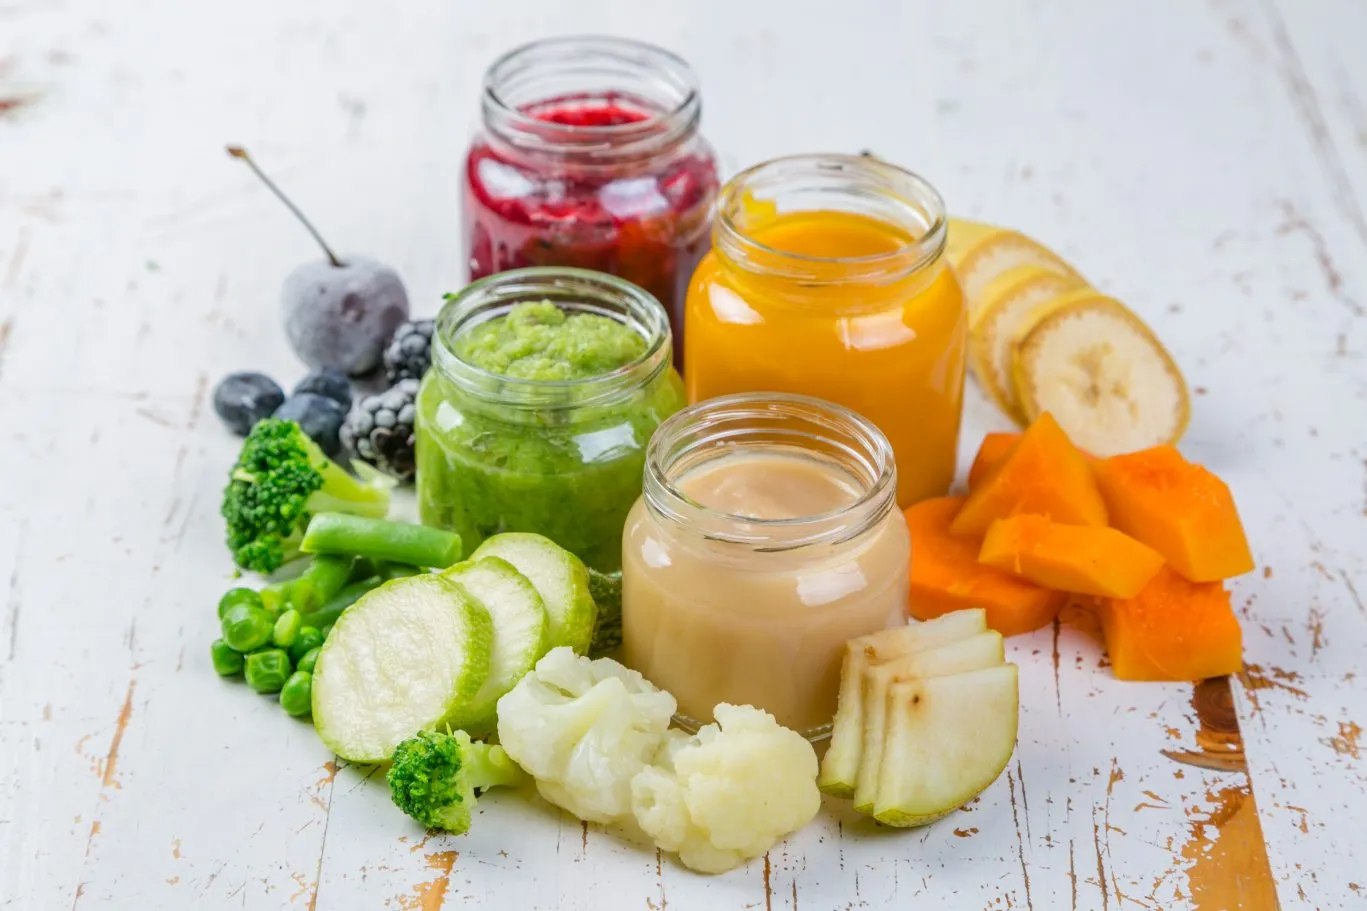
Begin with pureed veggies.
Full of complex carbs, fiber, vitamins, minerals and antioxidants, veggies are a dietary building block of wellness.
Why start with veggies other than the obvious reason that they’re chock-full of nutrients? The truth is, we’re not genetically predisposed to dislike certain foods. For the most part, we acquire a taste for what we like versus dislike. If a baby’s first exposure to solid food is something sweet, like fruit, they develop a taste, and preference for, sweet, sugary foods.
Start with mild-flavored veggies like peas, carrots or sweet potatoes. Once you’ve mastered these, move to more distinctive, strong-flavored vegetables, such as cauliflower, broccoli, asparagus, and spinach.
If your little one wrinkles their nose at the intense taste of one of these veggies, try combining it with the subtle natural sweetness of carrot puree. Do this after you’ve introduced carrots into their diet and are certain they don’t have any allergies or sensitivities to them.
Great firsts to try:
- Puréed carrots
- Puréed green beans or peas
- Puréed squash or sweet potatoes
- Mashed avocado (add a little milk or water to thin out consistency, if necessary)
Don’t expect them to eat much at first. Solid food is a new experience, so you’ll want to take it slow.
Next, transition to pureed meat.
You might not expect that meat would make the list of first foods for your baby, but it’s a wonderful food to introduce early on. It’s packed with protein and essential nutrients, such as iron and zinc, which deliver oxygen to their entire body and play a key role in supporting their immune system and growth.
Chicken is extremely high in protein and iron. It’s one of the most easily digested meats and is often recommended to be baby’s first meat. Turkey is normally the runner-up, followed by red meat. Avoid processed meats and those with added fillers, preservatives or sodium. More on how to choose quality meat HERE.
Generally speaking, it’s recommended to wait until your baby is 7-8 months old to begin introducing meat into their diet. I (Kalie) started feeding my girls veggie purees at 6 months, incorporated meats around 7 months and began introducing fruit and grains at 8 months. If you’re not a meat eater, that’s okay! Transition your baby straight from veggies to fruit and grains.
Great firsts to try:
- Chicken and Spinach Puree (recipe + video demonstration)
- Pureed beef and spinach
Hi Beautiful!
NEVER MISS AN UPDATE!
Sign up for our weekly newsletter to receive new recipes, healthy tips and our latest blog posts delivered straight to your inbox!
Newsletter (Never Miss An Update) – Posts
"*" indicates required fields
Now that your little one has acquired a taste for vegetables and meat, add pureed fruit into the mix.
Congratulations, your little one is a veggie-holic and is ready to taste test some fruit. Now that you know which meat and veggies your little one likes (and isn’t allergic to), you can try the fruit by itself, or create a fruit and veggie/meat combo. One of Isla’s favorites (which I’ll admit sounds a little strange) is pureed chickpeas with mashed banana.
Great firsts to try:
- Mashed bananas
- A combination of mashed banana and avocado
- Pureed peaches
- Pureed kiwi
How to know what stage food (and consistency) your baby should be eating
It’s important to be aware of texture and consistency when introducing all new foods to your baby. This allows you to make sure the food is in a form that your baby can safely handle without choking.
Every child is different and develops at their own individual pace, but most babies are ready for solids between 4-6 months. As with anything related to your baby’s health, it’s best to consult with your child’s pediatrician for baby food recommendations during the first 12 months. That being said, here are the general stages broken down.
Stage 1 Baby Food
Stage 1 baby foods are single-ingredient foods that are very thin in consistency. They’re served to babies who are just being introduced to solids and are typically between 6-7 months of age.
Consistency
If you’re pureeing a stage 1 baby food, you’ll need to thin the puree out until it reaches a smooth texture, can easily be dissolved with saliva and doesn’t require any chewing. You can do this by adding fresh filtered water during the pureeing process. You can also use formula or breast milk to thin the puree but should wait to do so until you plan on serving it. Start with a few tablespoons; you can add more if needed, a little at a time. As your baby becomes more accustomed to solids, you can reduce or omit the liquid completely.
Combinations
At this stage, it’s recommended to only introduce one new food at a time and to wait 2-3 days before introducing another new food. This allows your baby’s developing digestive system time to adjust, and allows you to watch for any allergic reactions or digestive setbacks before another food is added.
Stage 2 Baby Food
Once your baby has done well with stage 1 solids and has tried multiple foods, it is safe to advance to stage 2 baby food (8-9 months). At this point, the purees your baby eats can be a little thicker in texture with some mashable bits. This is also when parents often start combining purees together to create a mini meal such as carrots, sweet potatoes and chicken, or when they begin introducing mild spices (excluding salt).
Stage 3 Baby Food
By stage 3 (10+ months), your baby should be ready for chunkier purees or mashed foods that require some, but not much, chewing. These foods should be soft in nature so they’re easy to eat. By this stage, you may no longer need to add liquid to your puree to thin it out. This depends on both your baby and the texture of the food you’re serving. Think: thick blended foods with tiny chewable chunks.

How to puree Baby Food
Equipment Needed
There are plenty of appliances made specifically to whip up a batch of baby food, but the reality is, you really don’t need them. Steam your veggies in a steamer basket. Cook your meats in your usual pots, pans or slow cooker. Then puree your foods in your food processor. No food processor? A blender or immersion blender will work too.
- Steamer basket or large pot for tenderizing veggies
- A roasting pan, fry pan or slow cooker for cooking meat
- Food processor or high-speed blender to puree
- Mason jars, airtight containers or an ice cube tray with Ziploc bag for storing

How to Puree
- Cook the food until it’s tender either by steaming, baking, microwaving or boiling. Steaming maintains the most nutrients. Many parents prefer to not use a microwave (ourselves included); but there may be times when you’re in a pinch and that’s okay! When cooking meats and fish, remove all gristle, skin and bones before cooking and make sure they’re cooked completely through before pureeing. If you’re cooking the same food for the rest of the family, remove your baby’s portion before adding salt and heavy seasonings.
- Let the food cool, then put into the food processor and puree until smooth and creamy. You may need to add a few tablespoons of water to help the pureeing process. (When initially introducing these foods to your little one, make the consistency somewhat runny and then reduce the amount of liquid over time.)
- Portion out and transfer the puree into air-tight containers. Label your purees with the type of food, amount (in cups or ounces) and date so you can keep track of which ones to use first.
- If you plan to use the puree within a few days, place the pre-portioned puree in the fridge. Freeze any that you won’t be using within 3-4 days.
When should you add liquid to thin out the puree? Before or after freezing it?
There are a few different ways you can thin your puree. If you want to do it during the pureeing process, filtered water or broth work best.
You can also use breast milk or formula. But, because they may not have the same shelf life as the puree, we recommend adding them immediately before serving rather than during the pureeing process.
Storing your purees in the fridge or freezer
What size containers work best?
When Isla was a baby, I used 4 ounce glass containers to store all her purees in since she was only eating a tablespoon or two of solids at each meal. Once her portions increased (around 10-11 months), I began using 8-ounce glass mason jars so we didn’t have so many containers and dishes. Depending on the age of your baby and how frequently you’re pureeing, your storage preferences may vary too.
My favorite storage containers
- Sage Spoonfuls Baby Food Storage Containers: These 4-ounce glass jars are perfect for storing smaller portions. Now that the girls are older, we use them to freeze single-servings of hummus and pesto sauce.
- 8-ounce mason jars
Storing in the fridge
If you plan to use the puree within 4 days, transfer it into an airtight container and store it in the fridge.
Storing in the freezer
Most purees are extremely freezer-friendly and will keep in the freezer for up to 3 months. You can use two methods to freeze your purees depending on personal preference:
- You can freeze them in small cubes (some prefer this for stage 1 eaters who consume less). To do this, spoon the puree into an ice cube tray, wrap the top with plastic wrap so the puree isn’t exposed to the elements and freeze overnight. Once frozen, pop the puree “ice cubes” out of the tray and transfer them into a labeled Ziploc bag. Remove excess air from the bag, seal and store in the freezer.
- You can freeze the purees in airtight containers. We found the container method to be easiest, but it’s entirely up to you and what works best for your family.
When freezing purees, make sure to label each container with the type of food, amount (in cups or ounces) and date so you can easily keep track of which purees to use first.
How to defrost in the refrigerator
Place frozen puree cubes into a jar or serving dish, cover and place in the refrigerator to thaw overnight. If you stored the puree in a jar or storage container, simply place it in the fridge to thaw.
How to defrost in a water bath
If you’re crunched for time, set the jar or container in another bowl that’s filled with lukewarm water. Replace the water as needed. Once defrosted (30-60 minutes depending on the volume and temperature), portion out what you’ll be using and refrigerate the rest.
How to defrost in a water bath
For many of us, spending a few extra hours in the kitchen isn’t feasible, but making a little extra of something we already plan on preparing is 100% doable.
Any time you make a puree, prepare a large quantity, divide it into small portions and store the extras in the freezer for future meals. This is one of the BEST ways to simplify pureeing and successfully incorporate real-food purees into your baby’s diet. It also provides you with a variety of options to choose from as you build up a stock of different purees in your freezer.
Every day or two, you can take a peek in the freezer and choose the puree(s) you want to feed your baby over the next few days. Thaw the puree(s) in the fridge overnight and serve them cold, lukewarm, as-is or mixed with other purees. You can also add a little sauce (like pesto or marinara sauce) or a seasoning for additional flavor once your baby gets older (just avoid salt). This leads us to our next topic…
Variations to try
Combine the puree with other purees.
If your baby isn’t initially a fan of pureed foods (pungent veggies in particular), don’t give up. It may take a few times before they begin to acquire a taste for the veggie. You can try different flavor combinations to help them gradually build up a tolerance. Start with a 1:4 ratio, then slowly transition them to a 1:1 ratio and finally the food itself. A few options to mix-and-match:
- Veggies: carrots, peas, broccoli, green beans, zucchini, spinach, butternut squash, sweet potatoes
- Protein: beef, chicken, turkey
- Carbs: cooked quinoa, brown rice, lentils
- Fruit: blueberries, apples, peaches, pears, mashed banana
- Healthy fats: avocados (support digestion and brain development). Feel free to add some into your puree immediately before serving. Thin with milk or water if necessary.
Add herbs or spices.
For a boost in flavor, you can add herbs or spices into the food processor or blender to make the puree more appealing for your baby. Keep in mind that you want to choose complementary flavors, and a little goes a long way, so don’t overdo it!
An example of how I’ve done this in the past with carrot puree:
- By adding herbs that pair well with the pureed carrots, such as rosemary and thyme
- By adding a few spices such as cinnamon, nutmeg, cumin and a mild curry
Add yogurt.
If your baby has been given the okay to consume dairy, mix the puree with a few spoonfuls of whole milk yogurt or Greek yogurt. This adds a creamy flavor, is a great source of probiotics and provides a boost in protein and healthy fat.
A Few Tips When Pureeing Your Own Food
- Go organic: Harmful chemicals, pesticides and preservatives are heavily used these days, so we recommend organic produce whenever feasible. This is especially important because babies and small children’s bodies are still developing and are much more sensitive to exposure.
- Puree a variety of foods: By pureeing and introducing foods that aren’t as common, such as beets and asparagus, your kids will get accustomed to an array of different whole foods at a very young age. To this day our kids enjoy a huge variety or nutrient-dense foods with no pushback. I attribute much of this to the foods the girls ate from the time they were little.
- Steamer basket: If you plan on pureeing veggies on the regular (purees can be added to an array of nutrient-rich meals), invest in a steamer basket. They’re super inexpensive and worth every dime. Measure the size of your stockpot and purchase a steamer basket that fits. Steamer baskets not only simplify the steaming process, but the veggies also tend to taste better, cook faster and retain more nutrients because they never come in direct contact with boiling water.
- Bulk prepping: If you’ve followed our journey, you know how much we absolutely LOVE (and live by) cooking meals in bulk. While everything is out, make extra for the rest of the week and some to freeze for future meals.
- Easy storage: We love using 8-ounce mason jars when storing ½ – 1 cup portions of puree in the freezer. When storing smaller portions, we prefer these 4-ounce mason jars.
Introducing your little one to solid foods is an exciting milestone that helps shape their relationship with food in so many ways.
Establishing healthy eating habits during infancy and toddler years has a lifetime of benefits. When you make nutrient-rich foods a part of your family culture, your kids will grow up with the knowledge and power to nourish themselves with real, whole foods, rather than those that come pre-packaged and ultra-processed.
So, stock up on laundry detergent because it’s about to get real… what baby doesn’t love to finger paint with sweet potatoes?


0 Comments